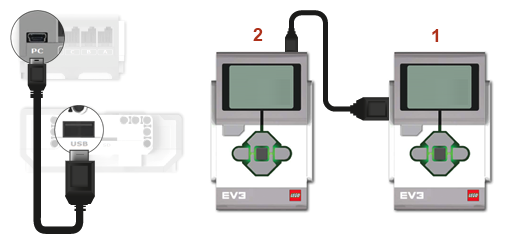
Daisy chaining allows multiple EV3 bricks to be connected using USB cables, enabling the first brick in the chain to control the motors and read the sensors connected to the others.
To set up the chain, connect the USB port on the side of the first EV3 brick to the mini USB (PC) port on the next EV3 brick. Repeat this connection pattern—USB port to mini USB port—for each additional brick in the chain. Up to four EV3 bricks can be daisy chained in this way.
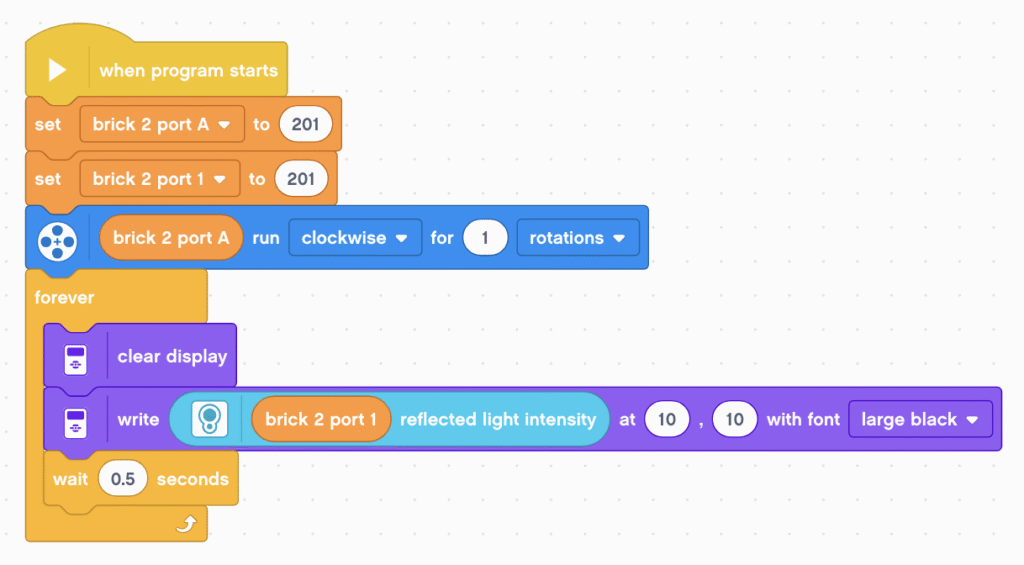
In EV3 Classroom, access motors or sensors on daisy-chained bricks (i.e. bricks 2 – 4) by setting a variable using the formula:
brick number × 100 + port number
For example:
- To select motor port B on brick 3, use 302 (3 × 100 + 2).
- To select motor port A on brick 2, use 201 (2 × 100 + 1).
- To select sensor port 1 on brick 2, also use 201 (same formula applies).
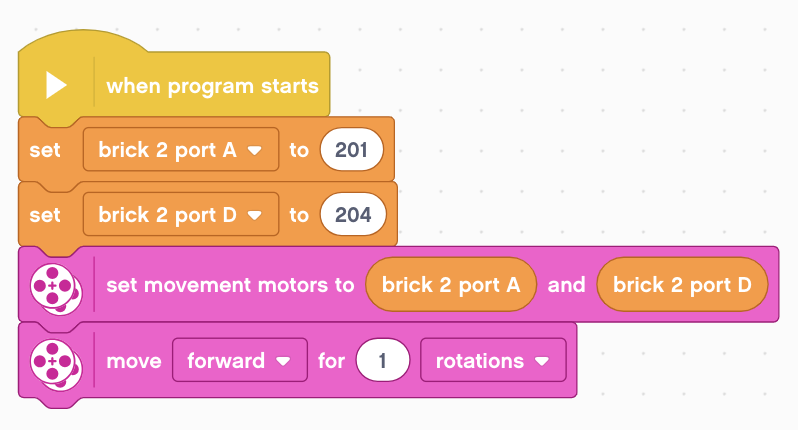
You can also configure a movement motor pair (e.g. for tank or differential drive) using motors on a daisy-chained brick. However, both motors must be on the same brick.
In earlier versions of the EV3 software (aka EV3 Lab), it was necessary to power on the bricks in reverse order—starting with Brick 4 and working back up to Brick 1—for daisy chain mode to work.
This doesn’t seem to be required with EV3 Classroom, but if you’re experiencing connectivity issues, it may be worth trying this approach.
Acknowledgement
Thanks to EV3Lessons.com for their PDF guide explaining how to use daisy chain mode in EV3 Classroom.